An article contributed by Darren Siow
A few months after I got my Brompton, the right side pedal began creaking. I tightened the screws but the creaking didn’t go away. A quick check around showed that this was a common issue. Recently, my left folding pedal began creaking too! As I had been used to riding with clipless pedals for many years, I took this opportunity to change the stock pedals to clipless ones. For the Brompton, I was going to use it as a commuting bike as well as for short rides around the neighbourhood to dao bao lunch, run errands etc. I wanted a pedal that would allow me to do all the activities. Searching online, I found few pedals that offered this functionality. I chanced upon the Shimano M324 and immediately bought it along with a pair of shoes which I could use on and off the bike. I like the Shimano M324 for its versatility; one side offers mountain bike style SPD cleat entry whilst the other side is a standard platform. Just right for me! (Weight weenie warning: they are about 530 grams per pair!)
The challenge I faced in replacing the pedals was the removal of the left stock Brompton pedal. The bolt that holds things in place is massive and I didn’t have any tools to match this bolt. During one of the LCSG gatherings, I spoke to someone who had also changed the stock pedals. I found out that he had used an unorthodox method to remove the pedal. So I followed suit.
I used a standard size adjustable spanner and a plier. The typical way to use a spanner is to fit the spanner at right angles to the bolt shaft. I made the adjustable spanner ‘bite’ onto the head of the bolt, parallel to the bolt instead of the correct orientation. This allowed only very little grip on the bolt. I tightened the jaws around the bolt head as much as I could. Consulting Google, I double-checked that the correct way to remove a left pedal is to rotate the bolt clockwise. With that confirmed, I gave the spanner a good swift tap with the pliers. The bolt seemed to turn but I wasn’t sure. So I gave it another tap. This time I could see the bolt turning! I was very happy and relieved that this unorthodox method worked! It helped that the stock pedal wasn’t very tight.
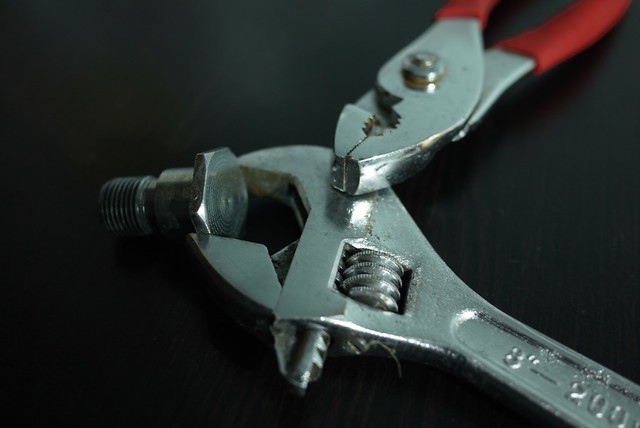 |
| The picture below gives you an idea how the spanner gripped onto the bolt head. |
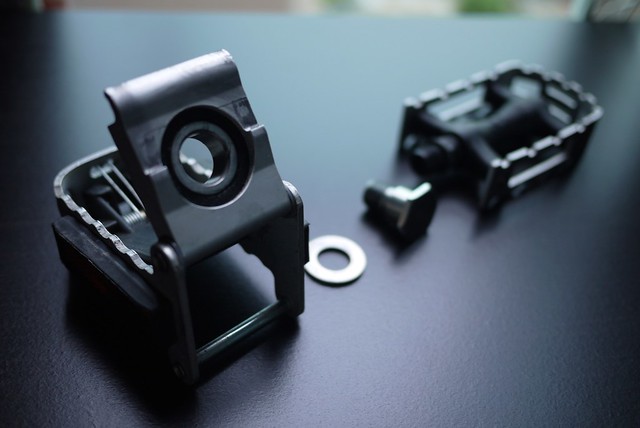 |
| Left Folding Pedal, Washer, Big Bolt & Right Pedal |
 |
| new left pedal |
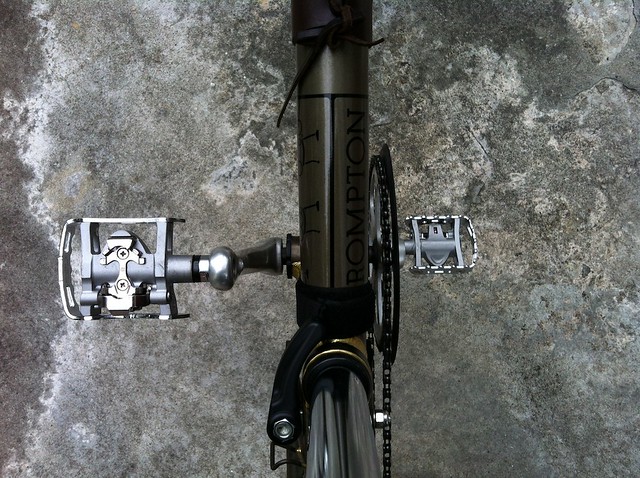 |
| looking down from the saddle |
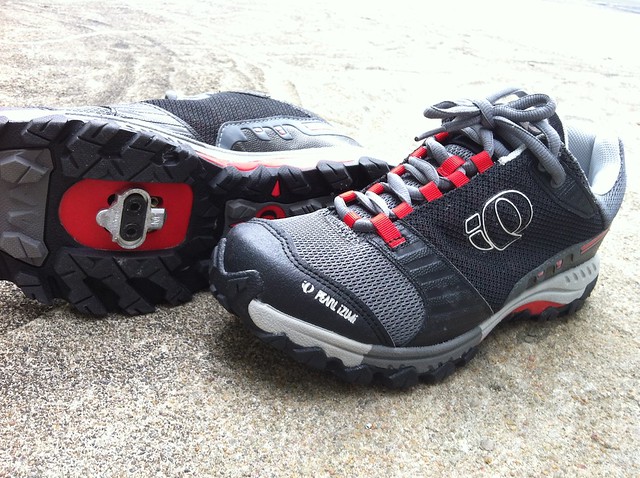 |
| Pearl izumi Mens' X-Alp seek IV cycling shoe |
I chose this pair of shoes because I can use them on my commute to work and then still wear them during the office day. I’m lucky that my work doesn’t require me to wear formal leather shoes. J The cleat (the metal piece that connects to the pedal) is bolted on in a recess of the shoe. This clever design was why I bought the shoes. The only thing that bugs me about walking around with this is that on certain uneven surfaces, I can feel and hear the cleat grinding against the road. On pavements and tiled surfaces, it works well.
The downside of having a non-folding left pedal is the increased size when the bike is folded. However, I know that I hardly need to transport or store my Brompton in the folded state, so I bit the bullet and switched to the clipless.
Today (18Mar2012), I went on my first ride with the clipless pedals and I have to say I love them! It makes me feel like I’m riding a real bike! :-P
Photo credits - Darren Siow

